
What Are Stations?
A Station represents a specific part or area of a production line or Measure Point.
For example, a packaging line might contain several Stations:
- Filling
- Capping
- Labelling
- Packaging
By associating Stations with Stop Reasons, you can capture more detailed information about where production problems occur.
This makes it easier to investigate recurring stops and identify areas for improvement.
Configuring Stations involves two steps:
- Create Stations and connect them to Measure Points.
- Configure Stop Reasons to support Station selection.
1. Create a Station
Stations are created and managed in GS Desktop.
How to Create a Station
- Open GS Desktop.
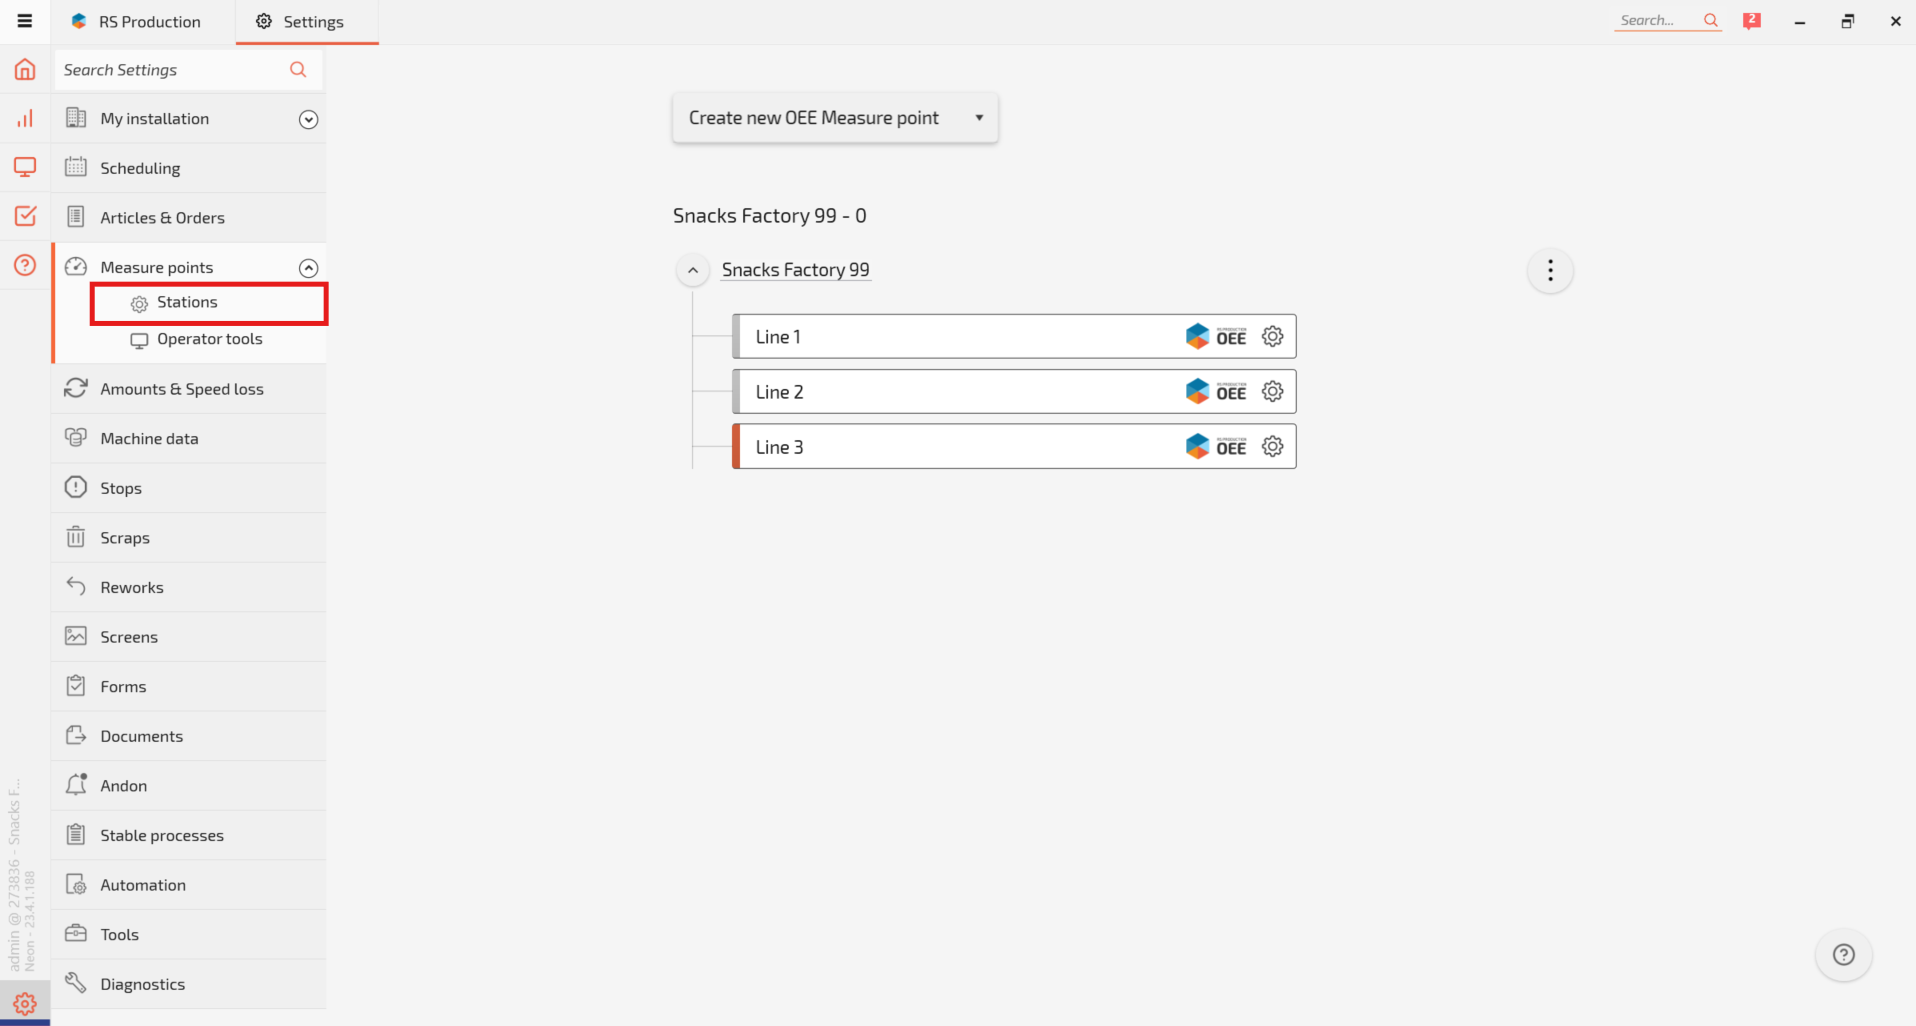
- Navigate to Settings.
- Expand Measure Points in the left-hand menu.
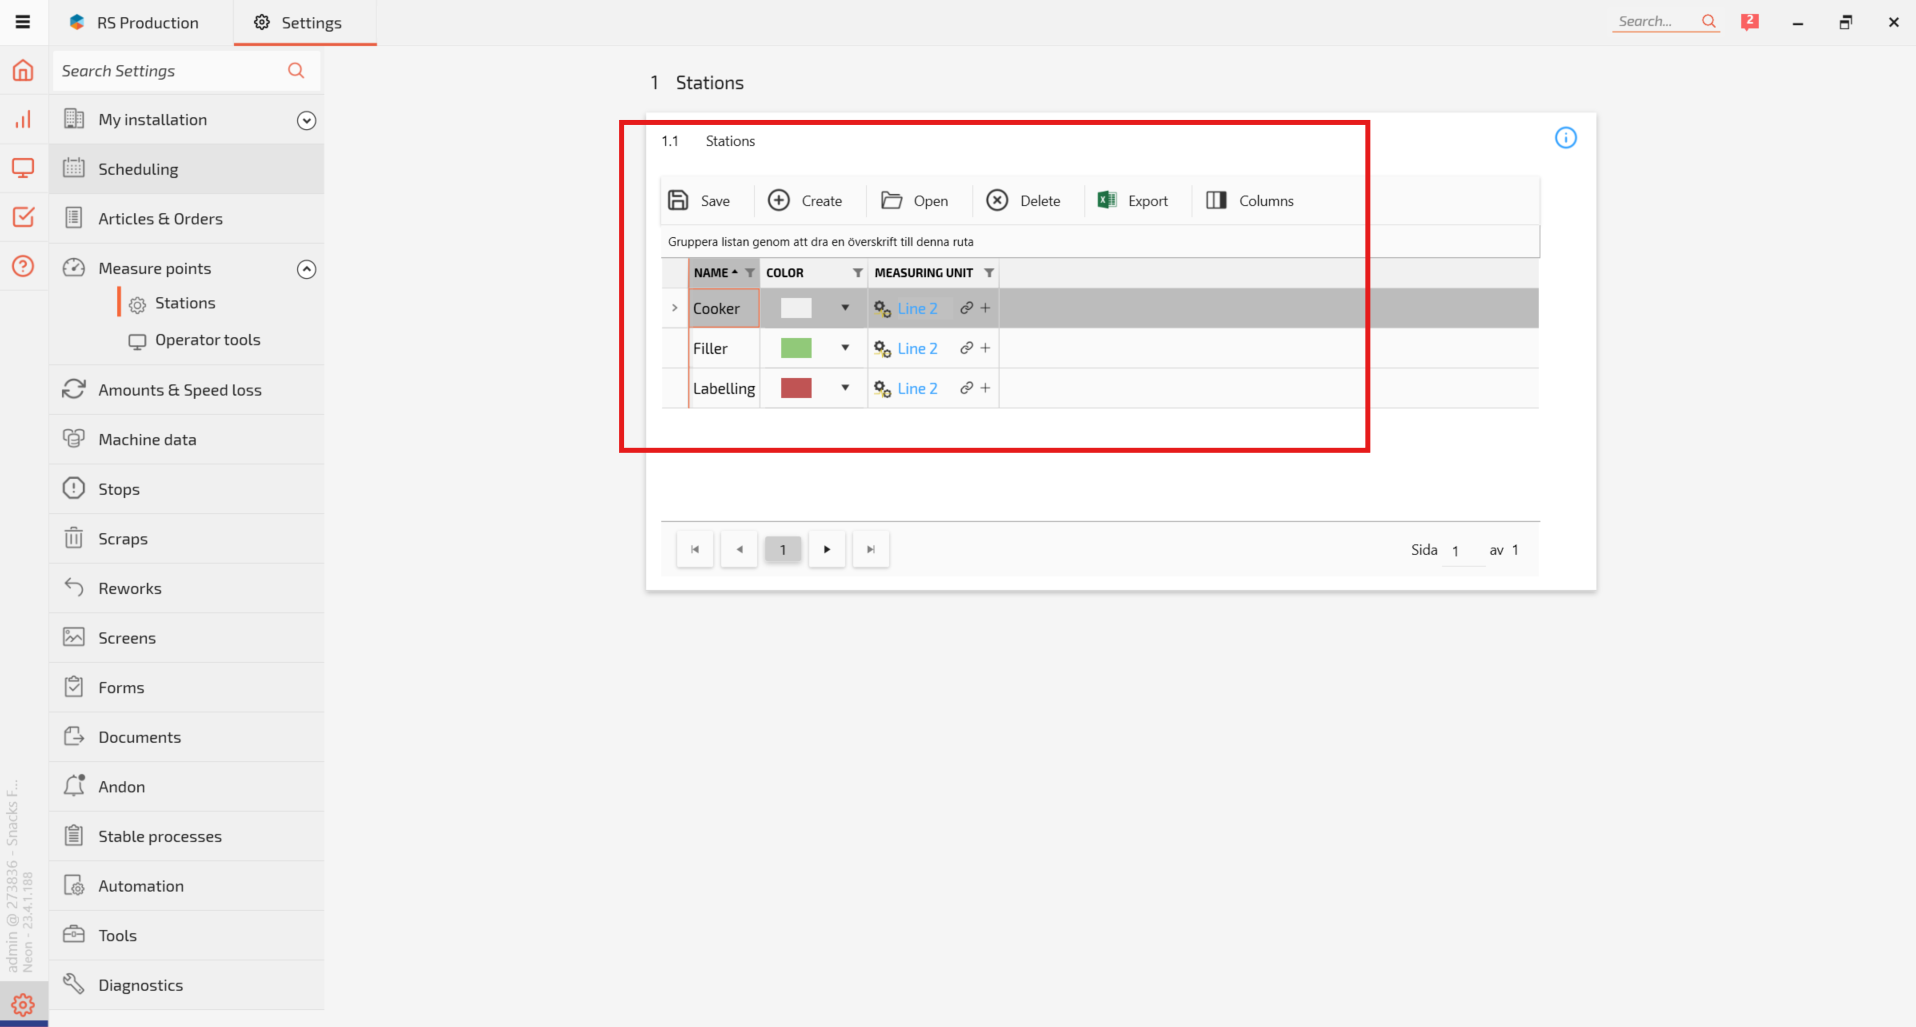
- Select Stations.
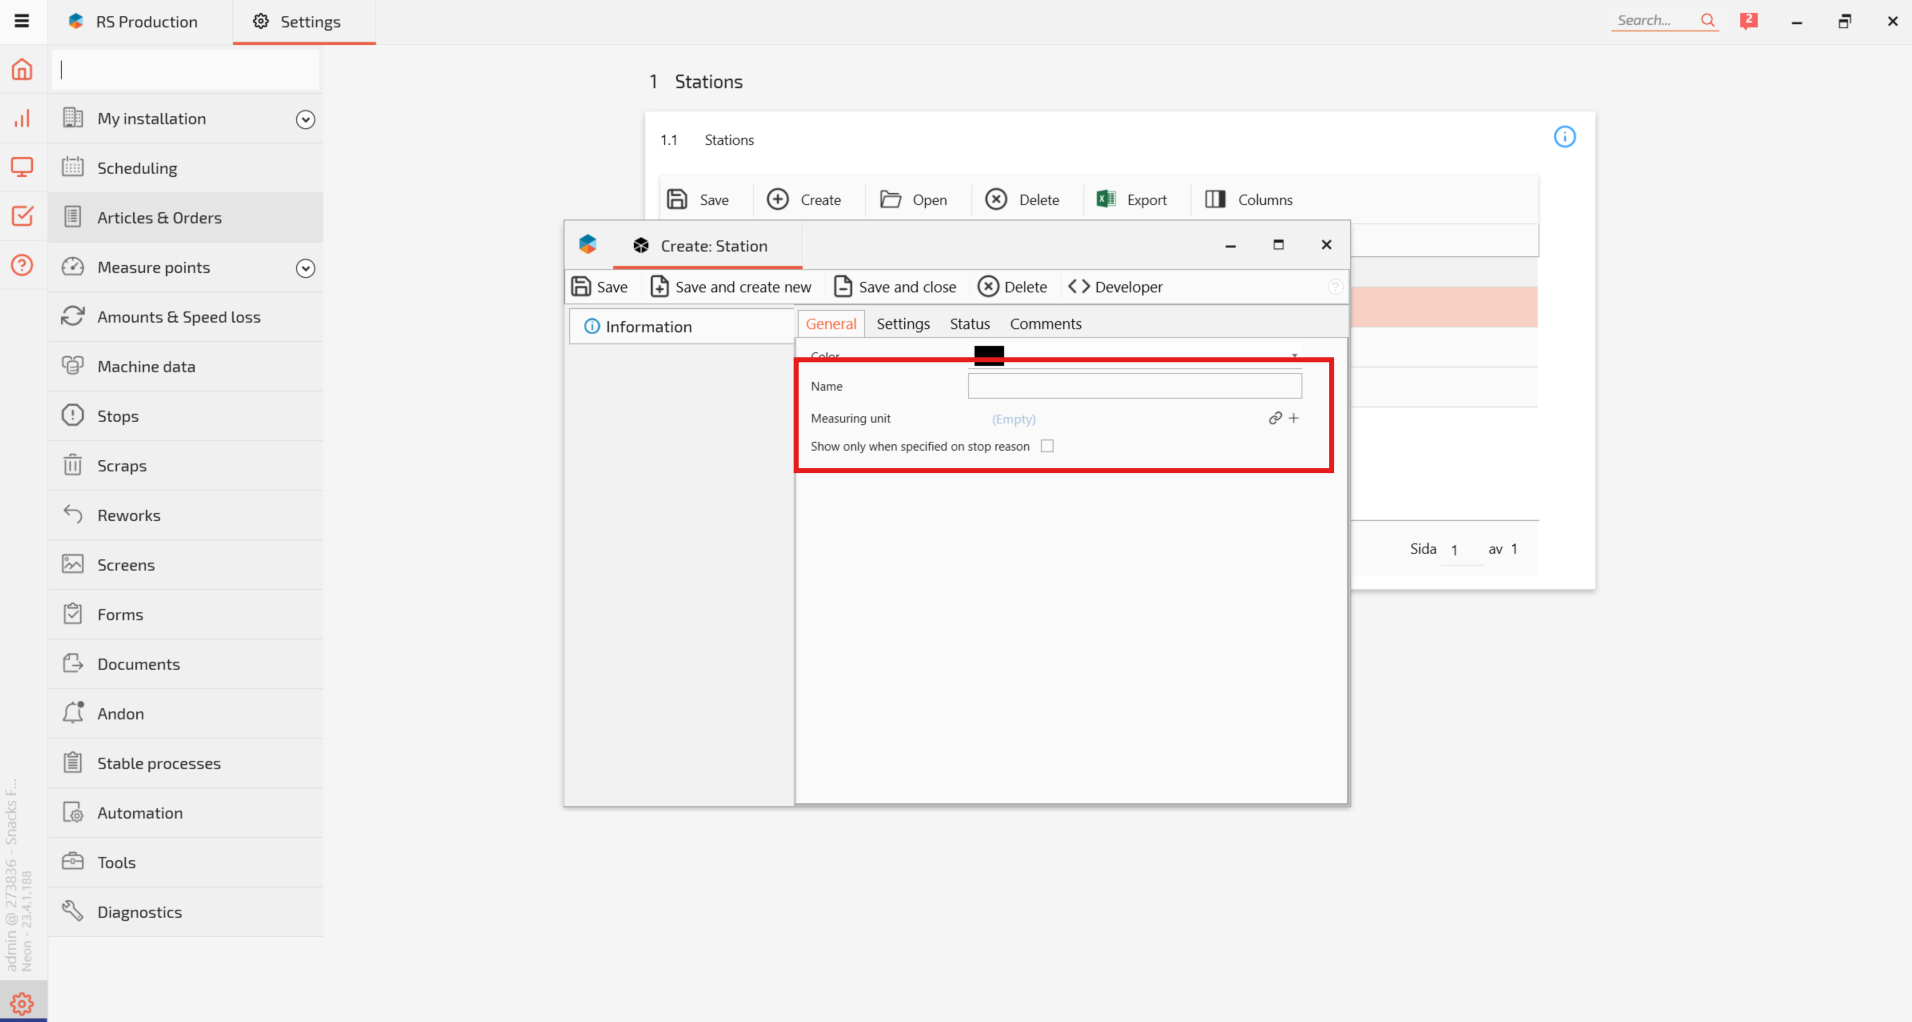
- Click Create.
- Enter a descriptive Name for the Station.
- Optionally, select a Color to make the Station easier to identify.
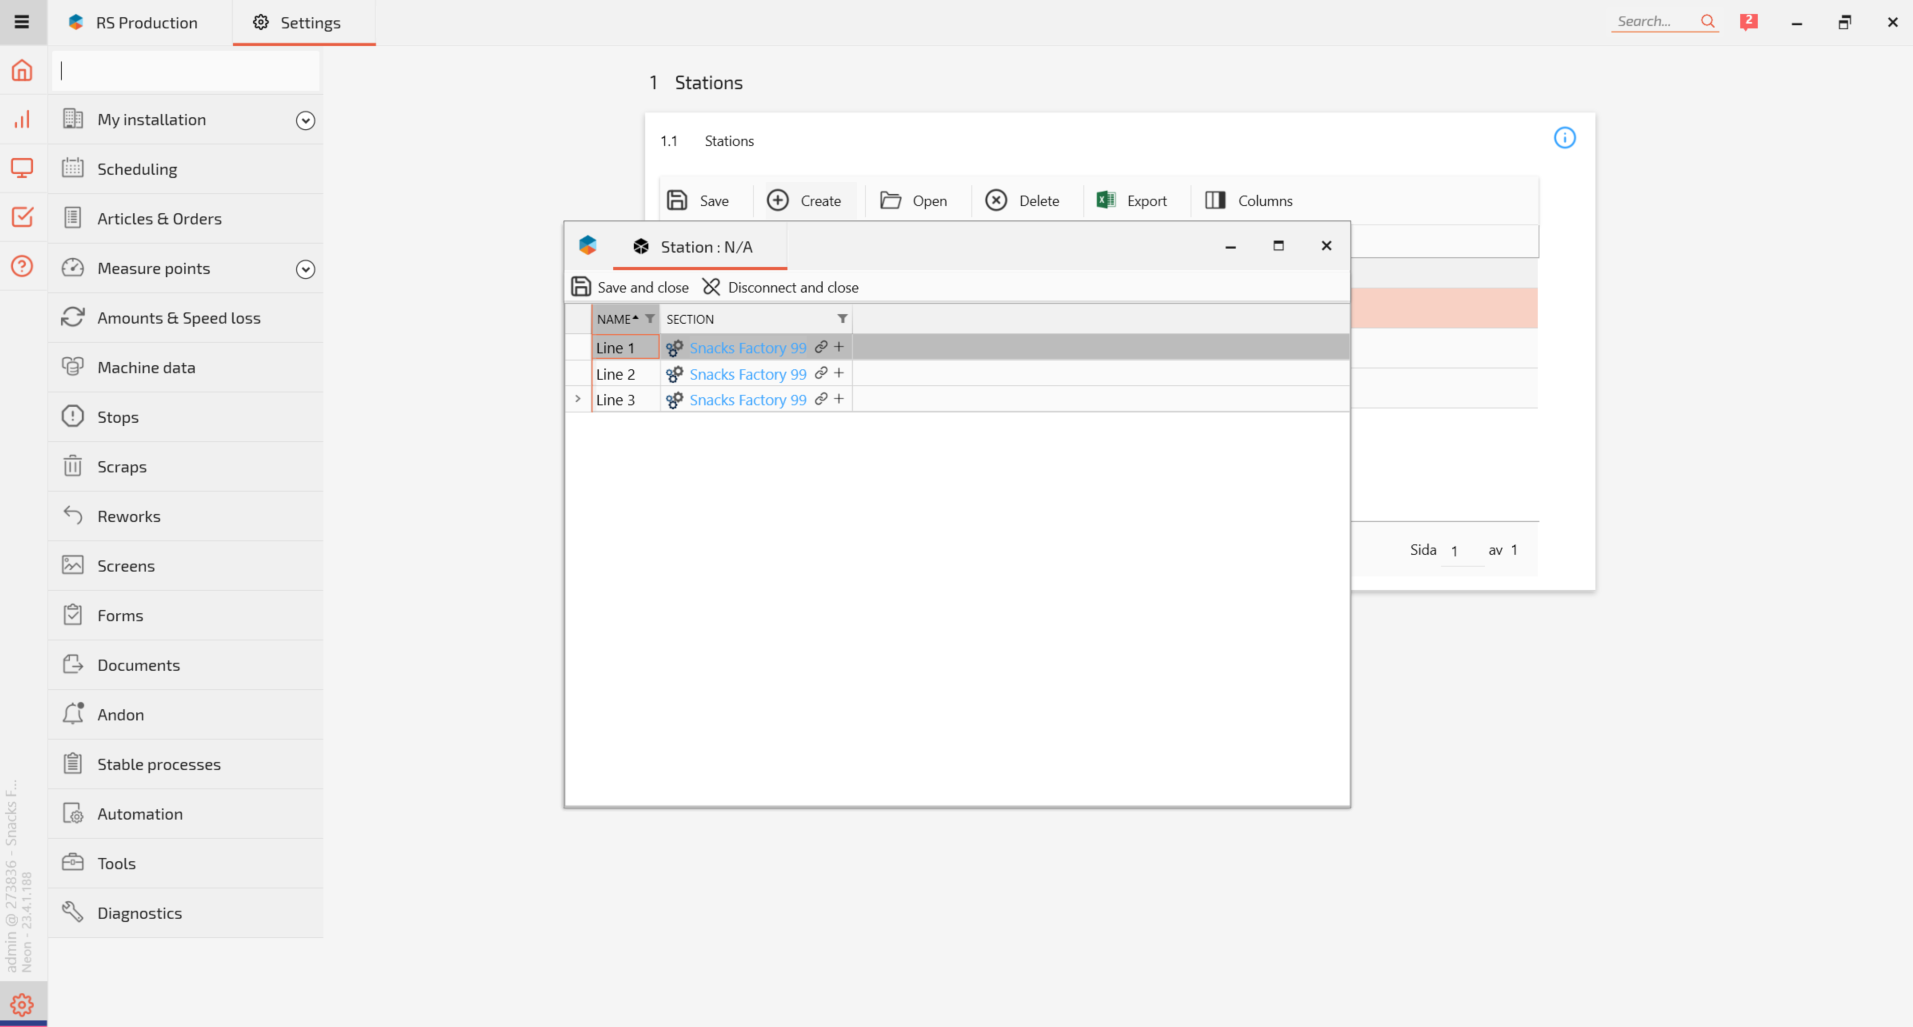
- Locate the Measuring unit field and click the selection icon.
- Select the Measure Point that the Station belongs to.
- Click Save and Close.
The Station is now created and associated with the selected Measure Point.
Repeat these steps to create additional Stations.
Example
Consider a production line called Packaging Line 1.
You could create the following Stations:
| Station | Measure Point |
|---|---|
| Filling | Packaging Line 1 |
| Capping | Packaging Line 1 |
| Labelling | Packaging Line 1 |
| Packing | Packaging Line 1 |
This allows different parts of the production line to be identified when registering production stops.
Tip: Use clear, consistent Station names that operators will recognize from their daily work.
2. Connect Stations to Stop ReasonsAfter creating your Stations, configure the Stop Reasons that should support Station selection.
How to Configure a Stop Reason
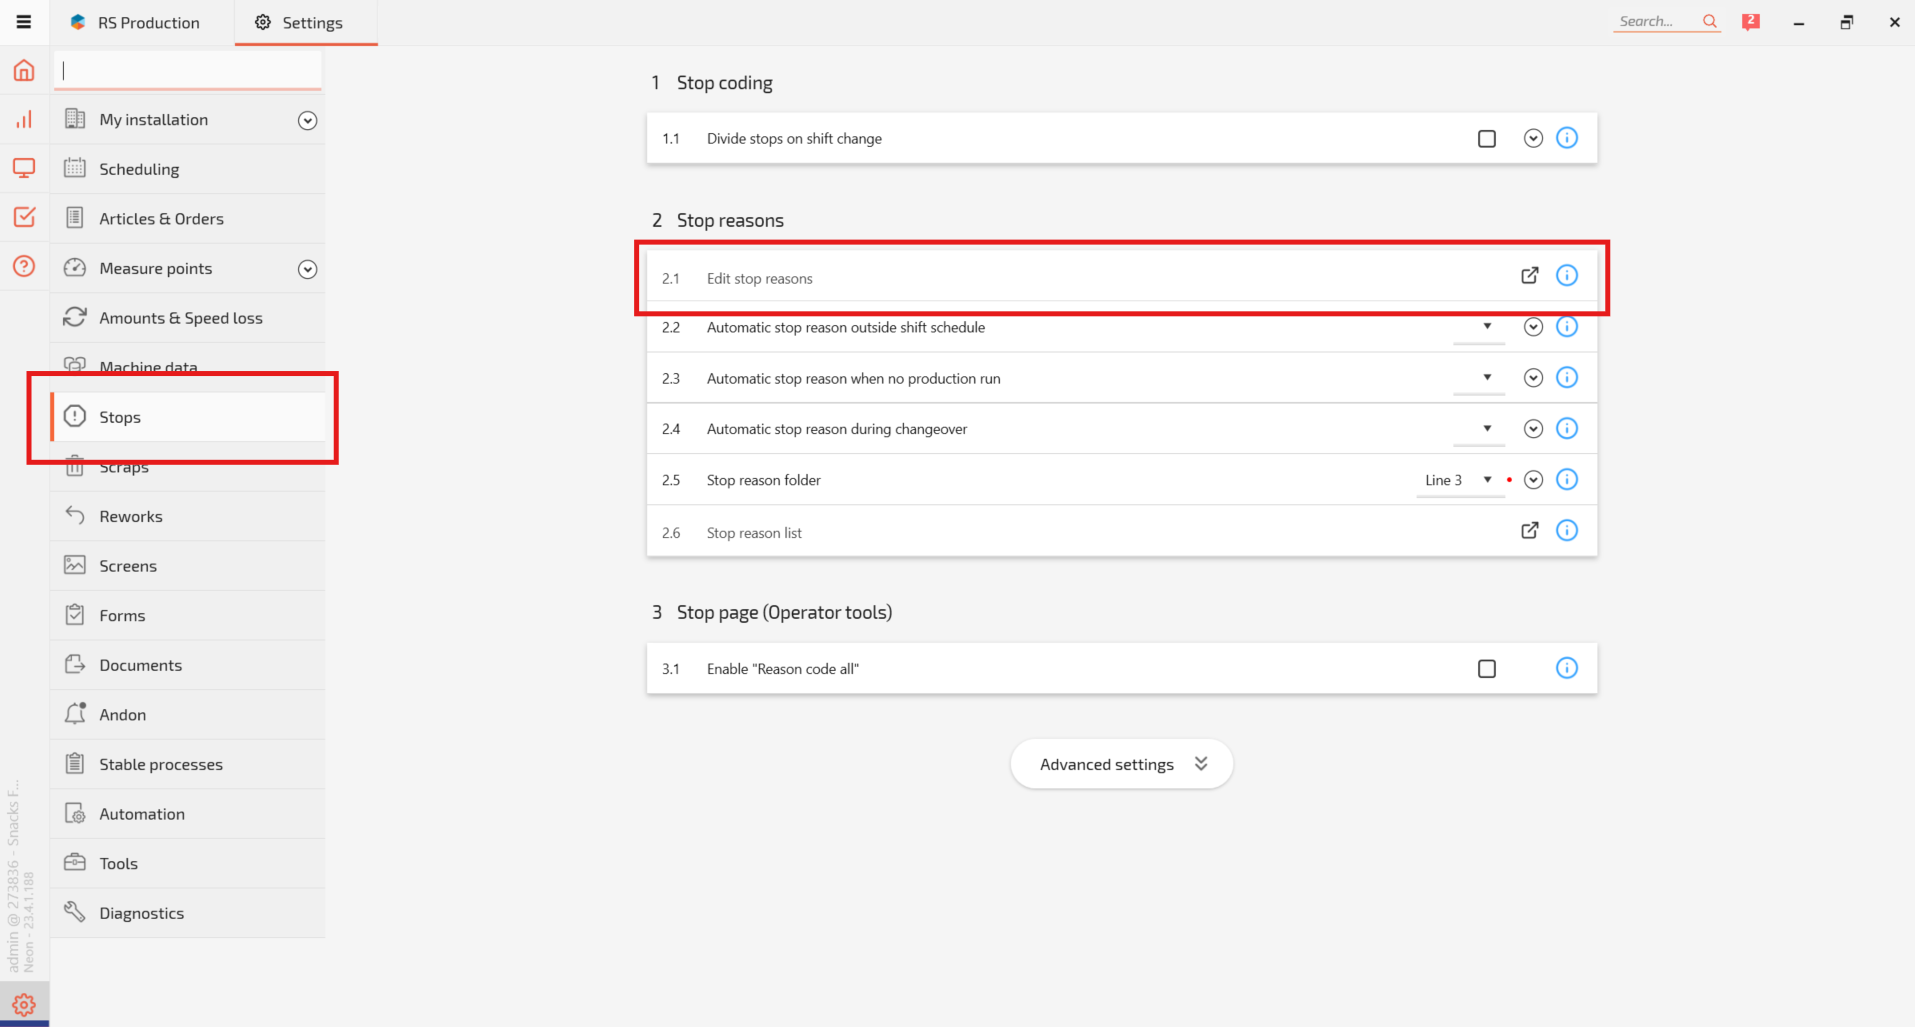
- In GS Desktop, navigate to Settings.
- Select Stops.
- Locate the Stop Reasons section.
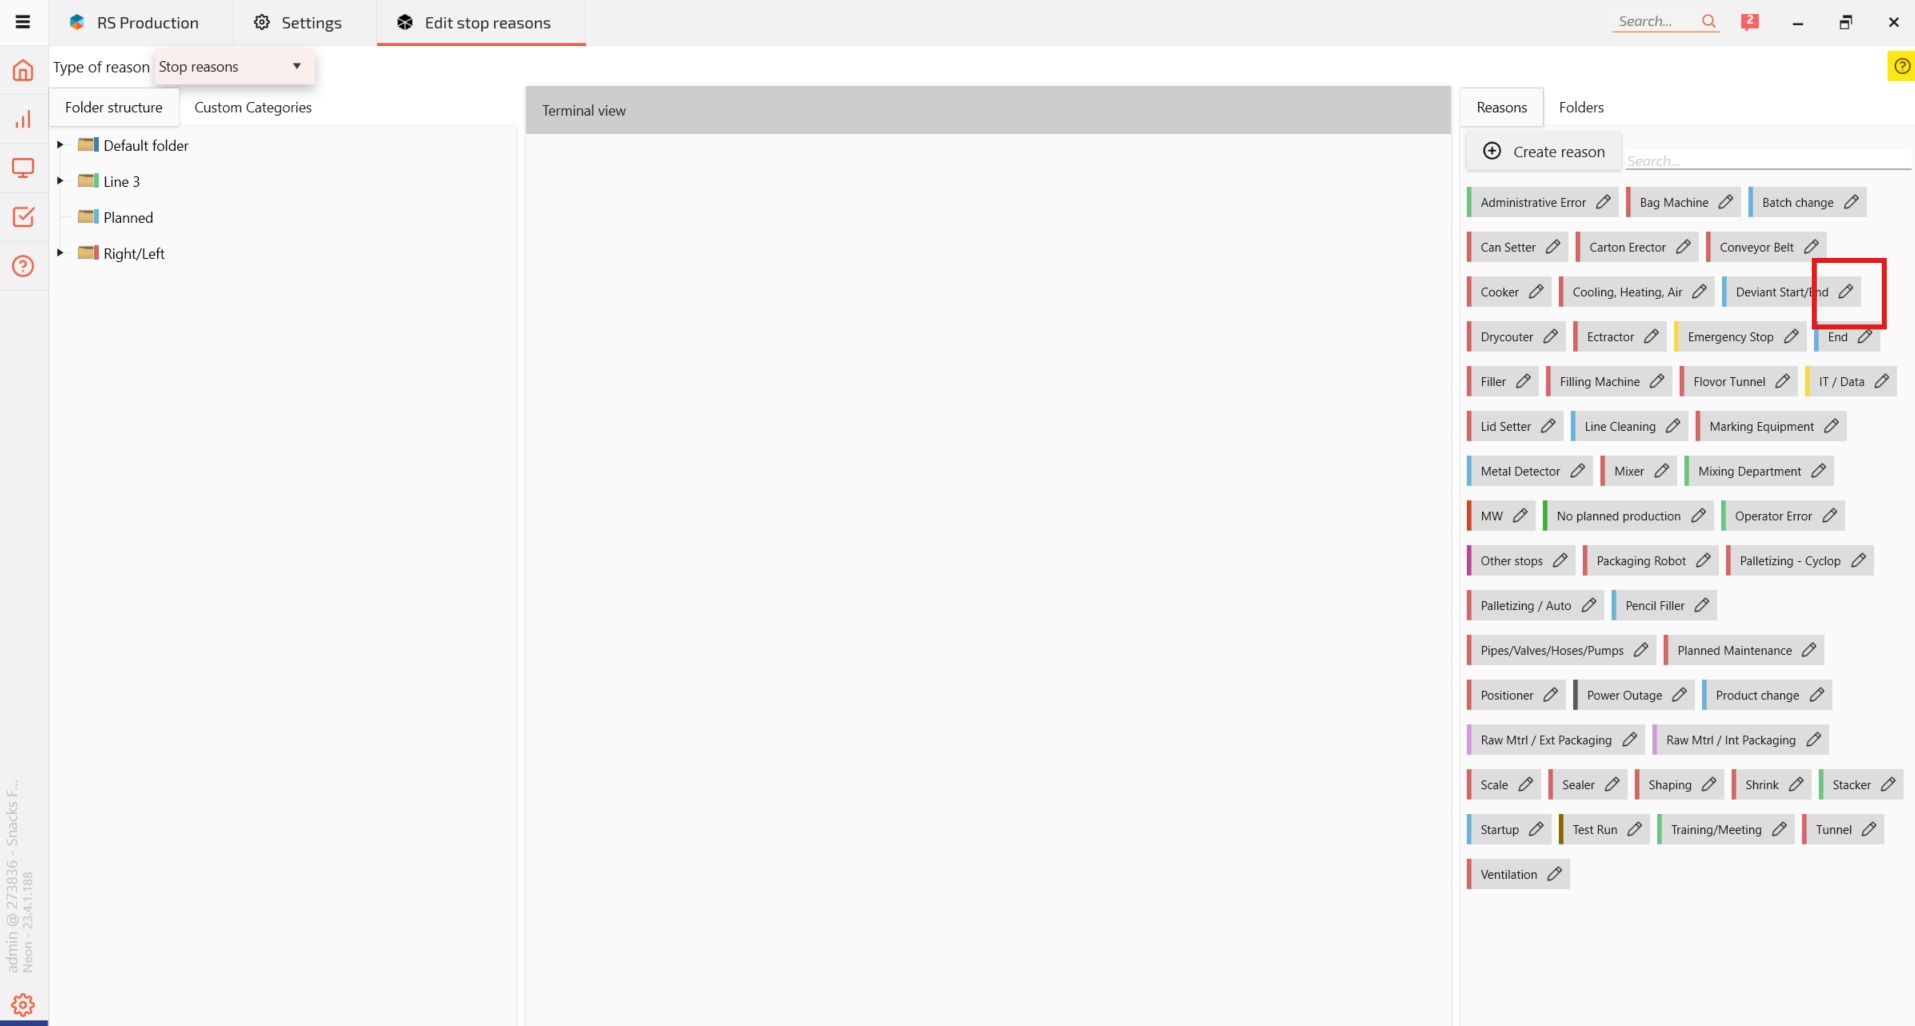
- Click the Edit Stop Reasons icon on the right.
- The Stop Reasons editor opens.
- Find the Stop Reason you want to configure.
- Click Edit for that Stop Reason.
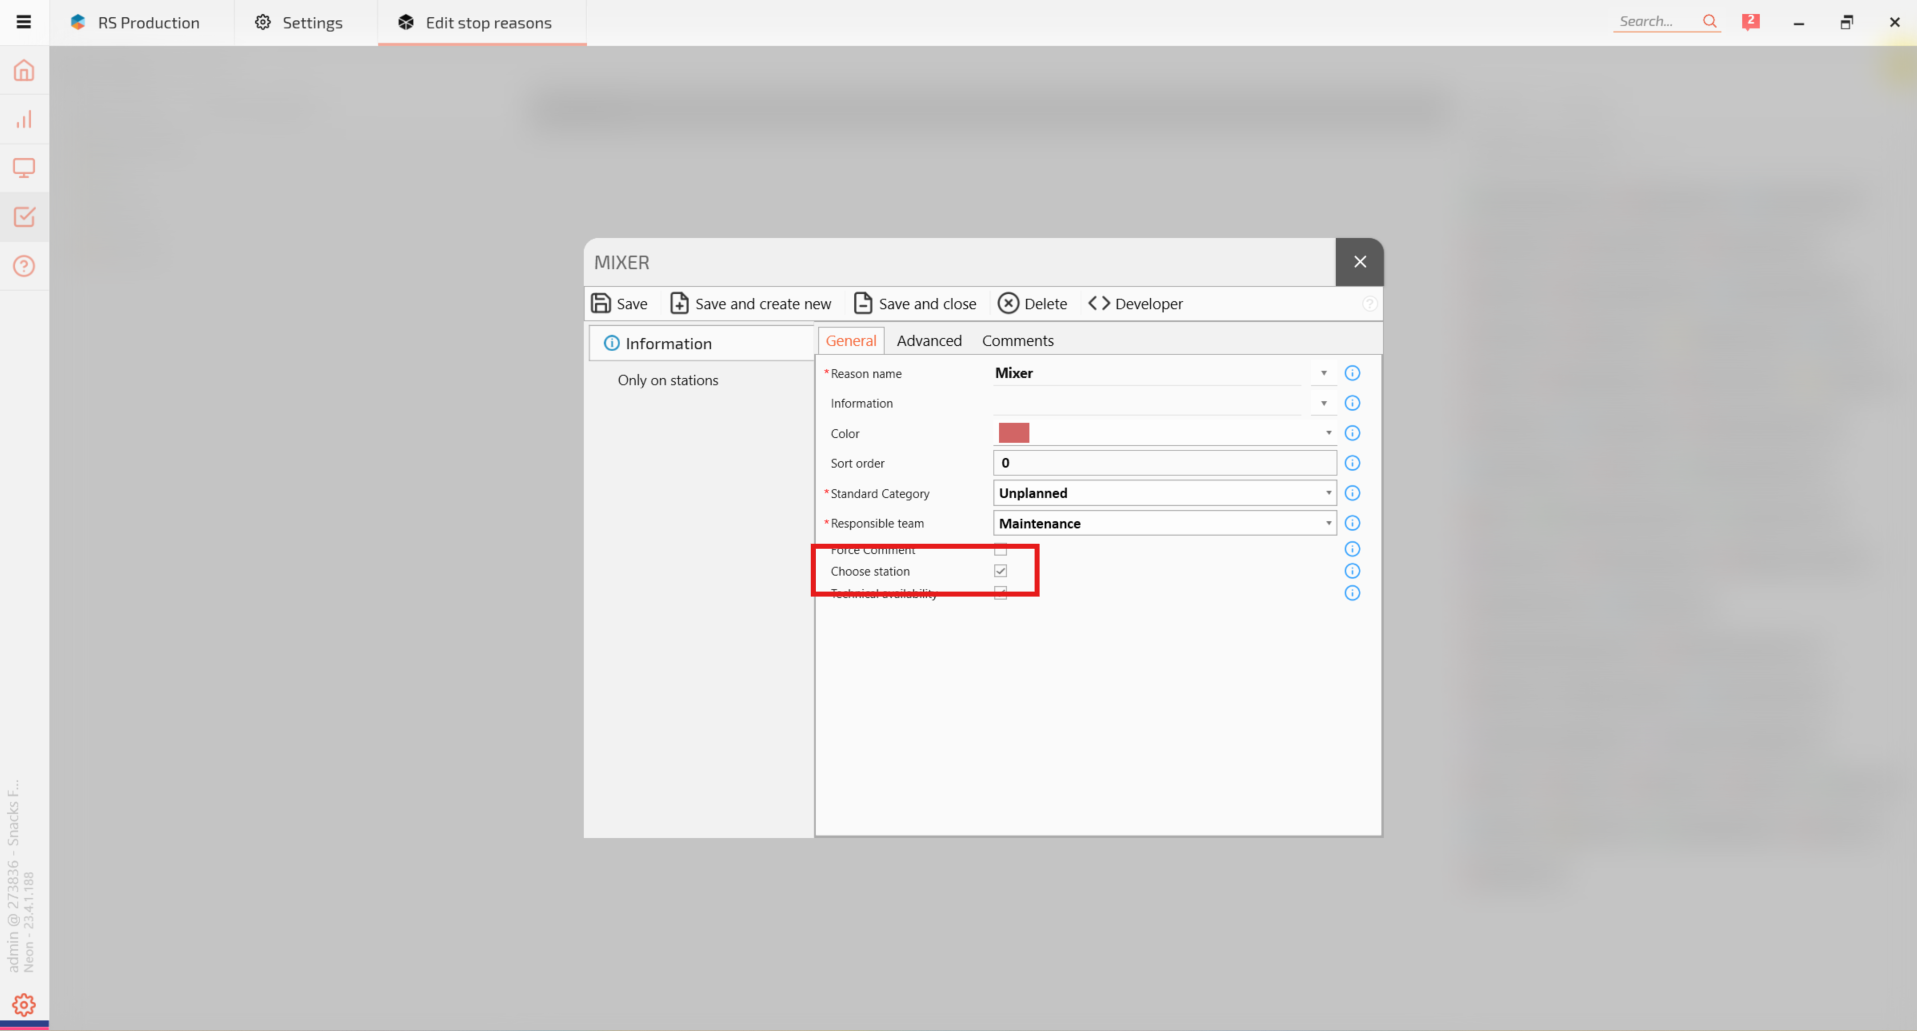
- In the General tab, locate the Choose Station setting.
- Enable the Choose Station checkbox.
- Click Save and Close.
The Stop Reason is now configured to support Station selection.
Repeat the process for other Stop Reasons where identifying the Station is useful.
3. Example: Identifying Where a Stop Occurred
Imagine a packaging line that experiences frequent material jams.
Without Station information, operators might register all these events using the same Stop Reason:
Stop Reason: Material Jam
However, the jams could occur at different Stations.
With Station selection enabled, the information becomes more specific:
| Stop Reason | Station |
|---|---|
| Material Jam | Filling |
| Material Jam | Capping |
| Material Jam | Labelling |
| Material Jam | Capping |
This additional information helps Production Managers and technicians understand where problems are occurring.
For example, if most material jams occur at the Capping Station, that area may deserve closer investigation.
4. When Should You Use Stations?
Stations are particularly useful when a single Measure Point contains several distinct production areas.
Common examples include:
- Assembly lines: Identify the assembly step where a stop occurred.
- Packaging lines: Distinguish between filling, labelling, and packing problems.
- Automated production lines: Identify which part of the equipment is responsible for recurring stops.
- Multi-stage processes: Separate problems occurring at different stages of production.
Not every Stop Reason needs Station selection.
For example, a general Stop Reason such as No Production Order may not be associated with a specific Station.
Use the Choose Station setting for Stop Reasons where additional location information helps explain or investigate the problem.
5. Best Practices
- Keep Station names simple. Use names that operators understand immediately.
- Avoid unnecessary Stations. Create Stations only where the additional information provides value.
- Connect Stations to the correct Measure Points. Verify that each Station belongs to the intended production equipment.
- Enable Station selection selectively. Focus on Stop Reasons where identifying the location improves analysis.
- Review your configuration periodically. Update Stations when production equipment or processes change.
Key Takeaways
- Stations represent specific areas within a Measure Point.
- Stations are created under Settings → Measure Points → Stations in GS Desktop.
- Each Station is connected to a Measure Point.
- Stop Reasons can be configured with Choose Station to support more detailed stop registration.
- Station information helps identify where recurring production problems occur and supports more focused improvement activities.