
Sometimes a production stop has more than one cause. Splitting a stop allows you to divide one production stop into separate periods so that each part can be assigned the correct Stop Reason.
When should you split a stop?Split a stop when the reason for the production loss changed during the stop.
For example, a machine may initially stop because of a Machine breakdown. After the machine has been repaired, production may remain stopped while Waiting for material.
Instead of assigning the entire stop to one reason, you can split it so that the time is recorded accurately:
- 08:00–08:20: Machine breakdown
- 08:20–08:30: Waiting for material
- Open Operator Tools.
- Go to the page where production stops are shown.
- Find and select the stop you want to split.
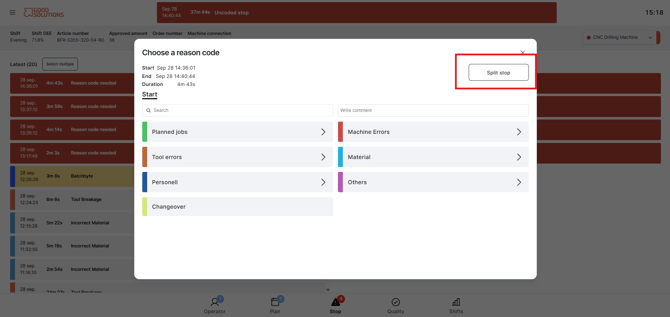
- Choose the option to Split the stop.
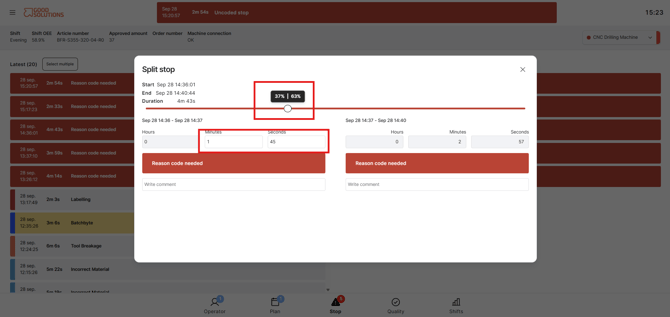
- Select the time when the reason for the stop changed.
The original stop is now divided into separate production stops.
Code the split stops
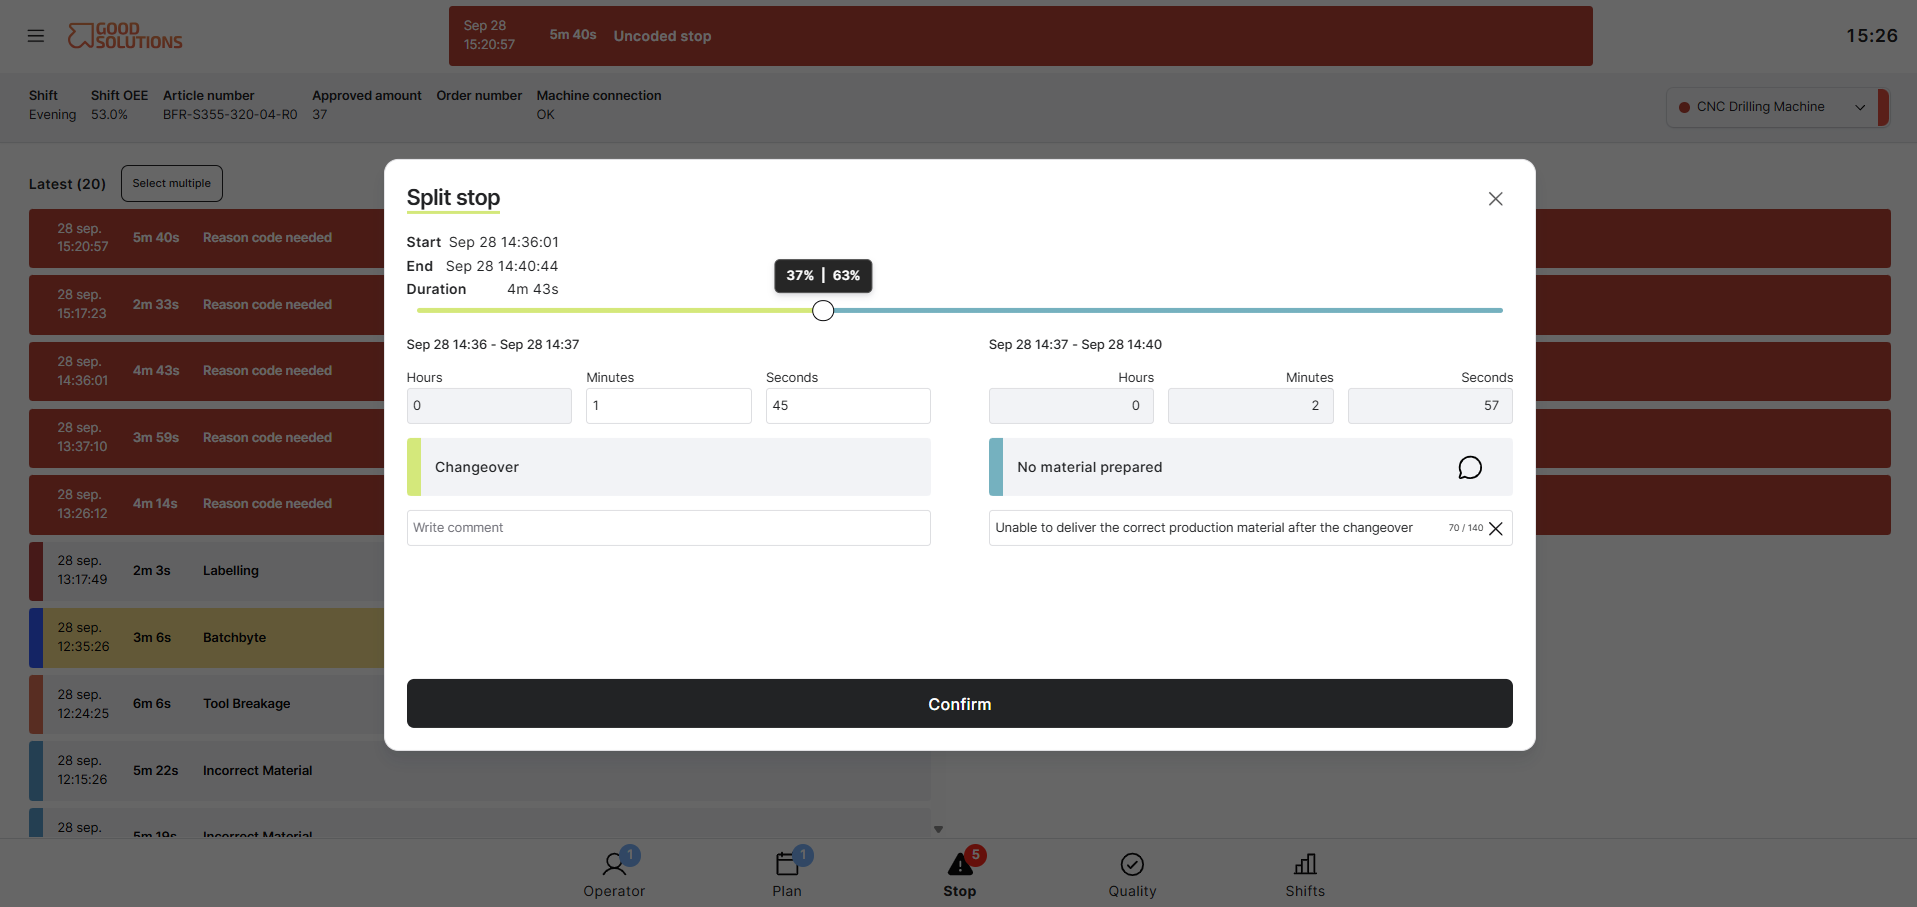
After splitting the stop, assign the appropriate Stop Reason to each part. If necessary, provide a comment for each new stop.
Make sure that each Stop Reason represents what was actually preventing production during that period.
The confirm your selection.
Splitting stops helps ensure that production losses are attributed to the correct causes.
Accurate stop data makes it easier to:
- Understand where production time is being lost
- Identify recurring production problems
- Analyse Stop Reasons and Stop Categories
- Improve the accuracy of Availability and OEE analysis
- Prioritise the right improvement activities