
What are Trigger Settings?
Trigger Settings determine when and under which conditions a Form is automatically triggered in Good Solutions.
By configuring these settings, you can connect Forms to production activities such as starting an order, changing shifts, producing a certain quantity, or categorizing a production stop.
This helps ensure that important inspections, quality checks, and other procedures are performed at the appropriate moment.
Step 1: Open Trigger Settings
- Navigate to Forms in Good Solutions Web.
- Open the Form you want to configure.
- Select the Settings tab.
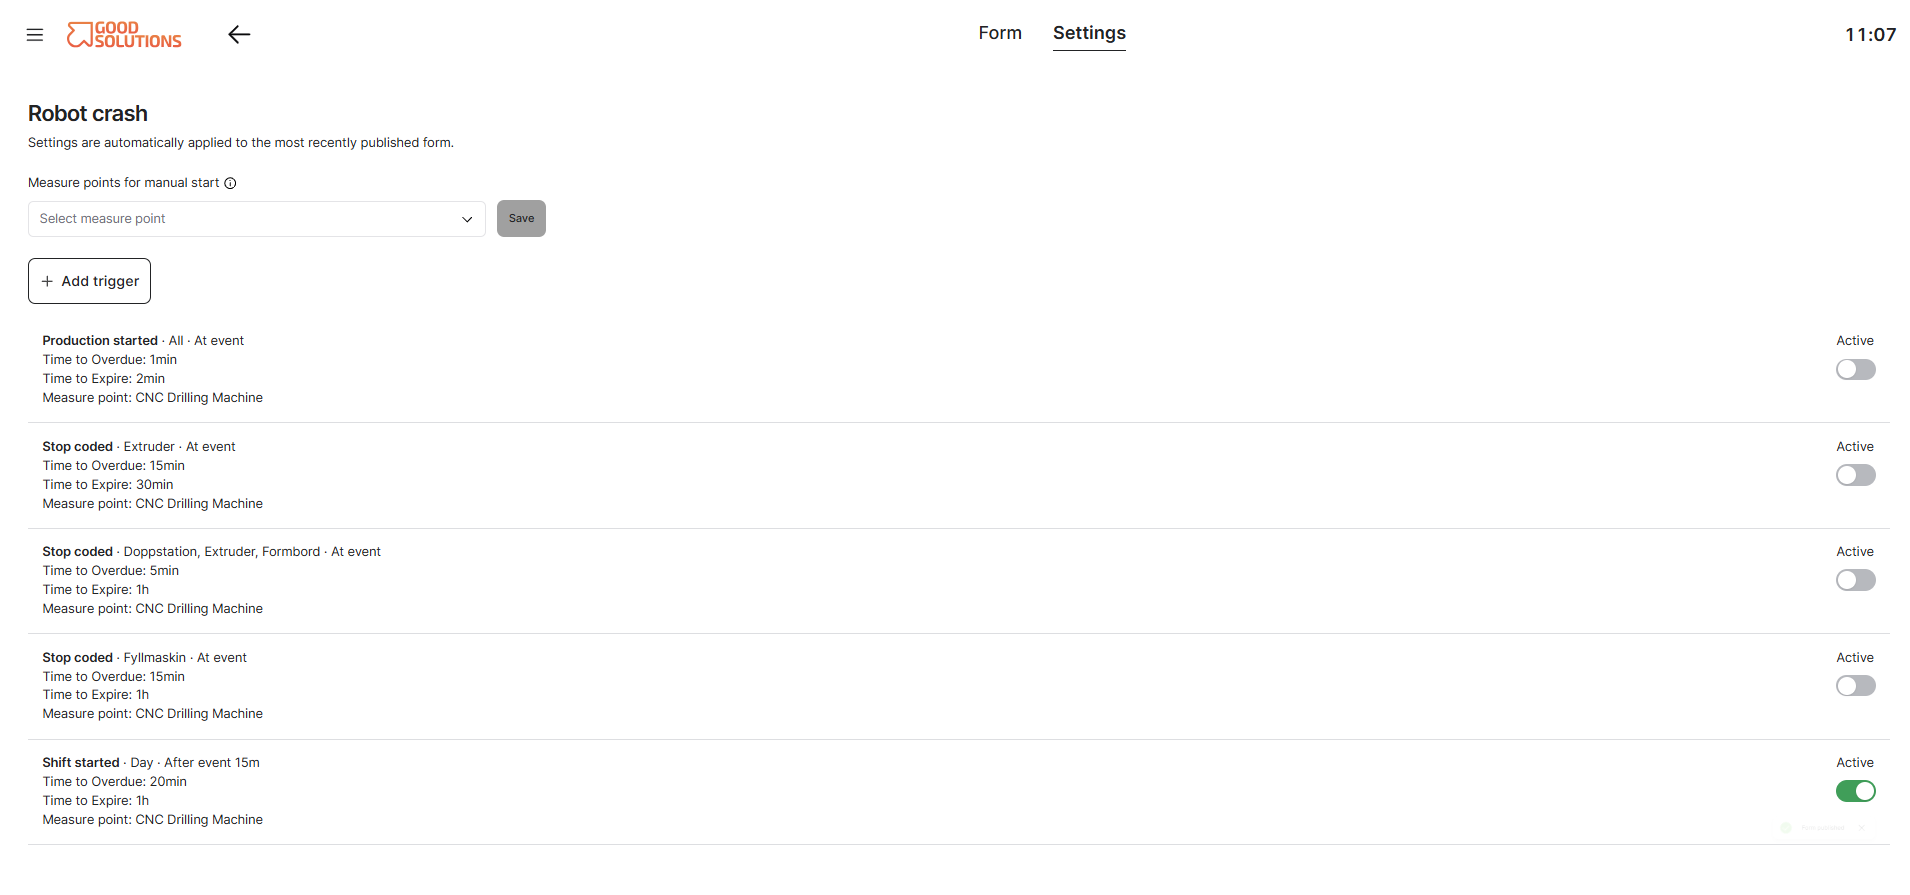
- Locate the Triggers section.
- Add a new Trigger or select an existing Trigger to edit its settings.
The available configuration options depend on the type of Trigger you select.
Step 2: Assign the trigger to selected Measure points
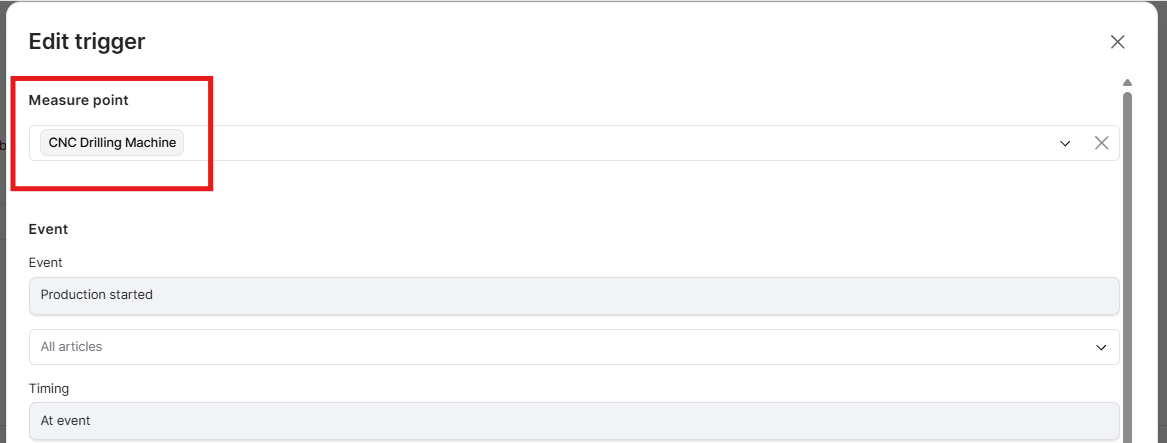
This setting limits the trigger to the Measure Points that you define.
Step 3: Select an Event type
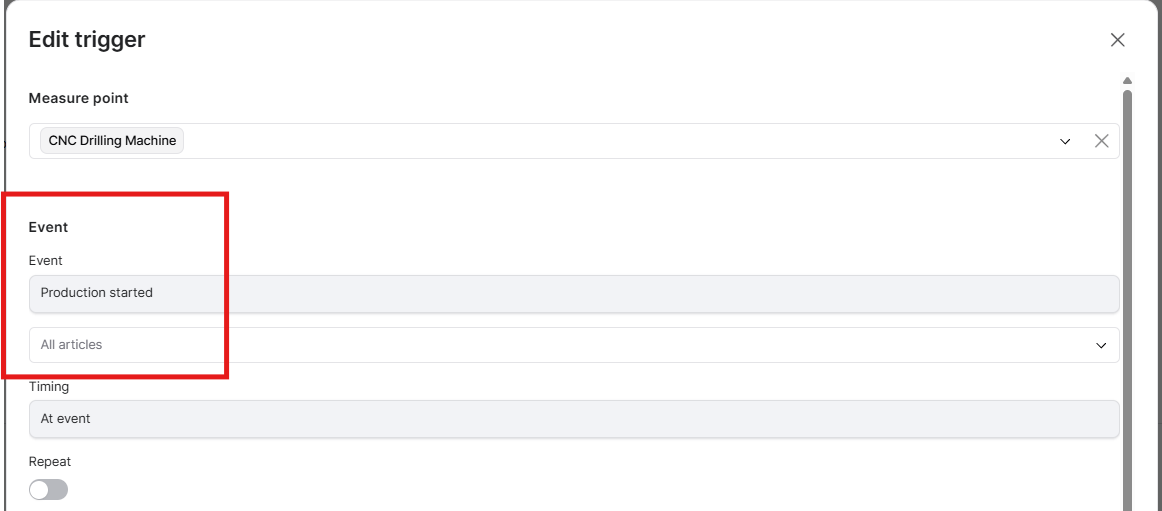
Good Solutions supports different types of production events that can be used to trigger Forms.
Article and Order events
Trigger a Form based on the start or completion of an Article Run or Production Order.
Examples:
- Perform a first-piece inspection when a new Article Run starts.
- Complete a setup checklist when a production order starts.
- Perform a final quality inspection when an order finishes.
These triggers are particularly useful for standardizing procedures at the beginning and end of production runs.
Shift events
Trigger a Form when a production shift starts or ends.
Examples:
- Complete a safety checklist at the beginning of each shift.
- Perform a machine inspection before starting production.
- Complete a shift handover checklist at the end of a shift.
Shift-based triggers help ensure that important routines are performed consistently across shifts and teams.
Produced Amount
Trigger a Form based on the quantity of products manufactured.
Examples:
- Perform a quality inspection after producing 100 units.
- Check product dimensions every 500 units.
- Complete a sample inspection after reaching a defined production quantity.
This is useful for quality control processes that require checks based on production volume rather than time.
Scheduled and Interval Triggers
Trigger Forms at specific times or recurring intervals.
Examples:
- Perform a daily equipment inspection at a scheduled time.
- Complete a production check at regular intervals.
- Carry out recurring quality checks throughout a shift.
These triggers are useful for procedures that must be performed regularly, regardless of specific production events.
Scrap and Rework events
Trigger a Form when scrap or rework is registered in production.
Examples:
- Request additional information when scrap is recorded.
- Trigger a quality investigation when rework is registered.
- Perform a follow-up inspection after a quality issue.
These triggers help capture additional information about quality losses and support structured problem-solving.
Categorized Production Stops
Trigger a Form when a production stop is categorized with a stop reason.
Examples:
- Trigger a maintenance checklist when a machine breakdown is recorded.
- Request additional information when a quality-related stop is categorized.
- Initiate a follow-up inspection after a specific type of production interruption.
This makes it possible to connect structured procedures directly to production problems.
Step 4: Configure Trigger timing
Depending on the Trigger type, you can configure when the Form should become available relative to the production event.
The available timing options may include:
| Timing | Description | Example |
|---|---|---|
| At | Trigger the Form when the event occurs. | When a production order starts. |
| Before | Trigger the Form before a specified event. | Before a scheduled shift ends. |
| After | Trigger the Form after the event. | 10 minutes after a production order starts. |
The timing options available depend on the selected Trigger type.
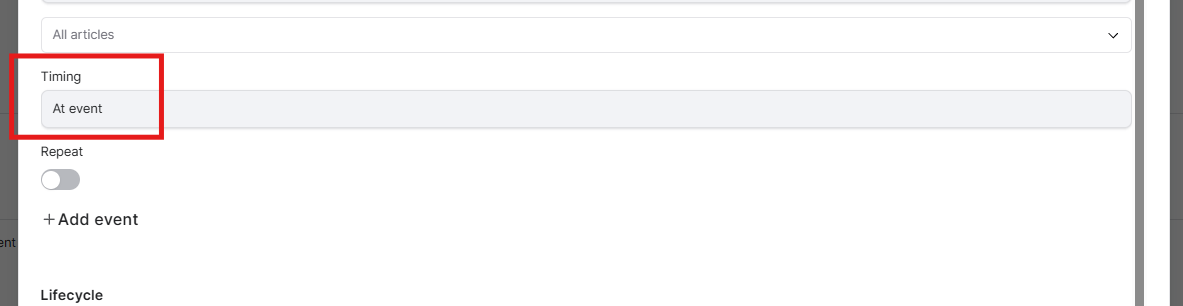
Tip: Choose a timing that fits the Operator's workflow. For example, a startup inspection may be most useful at the beginning of an order, while a quality check may be more appropriate after production has been running for some time.
Step 5: Configure Trigger conditions
Some Trigger types allow you to specify additional conditions that determine when the Form should be triggered.
Depending on the Trigger, these may include:
- Measure Points: Specify where the Trigger should apply.
- Production events: Select the event that activates the Trigger.
- Produced quantity: Define the number of units that should activate the Form.
- Stop reasons: Select the categorized production stops that should activate the Form.
- Time settings: Specify the time or interval associated with the Trigger.
For example, you could configure a Form to be triggered when a machine stop is categorized as a mechanical breakdown.
This allows you to target Forms to specific production situations rather than triggering them unnecessarily.
Step 6: Configure recurring Triggers
Some Forms need to be completed repeatedly rather than only once. Click Repeat to define how.
Recurring Triggers allow you to automatically present a Form at defined intervals or production quantities.
Example 1: Recurring quality inspection
A quality inspection needs to be performed every 500 produced units.
Configure a Produced Amount Trigger with a recurring quantity of 500 units.
Example 2: Regular production check
An Operator needs to perform a process inspection every two hours.
Configure an interval-based Trigger to present the Form at the required frequency.
Recurring Triggers help standardize routine checks without requiring Operators to remember when they should be performed.
Step 6: Configure the Form Lifecycle
The Lifecycle settings determine how long a triggered Form remains available for completion and what happens if the Operator does not complete it within the expected time.
This helps ensure that time-sensitive inspections and procedures are completed when they are relevant to production.
Depending on the configuration, a triggered Form can progress through different stages:
- Ongoing: The Form has been triggered and is available for the Operator to complete.
- Delayed: The Form has not been completed within the expected time but can still be completed.
- Expired: The Form has passed its allowed completion period and is no longer available for completion.
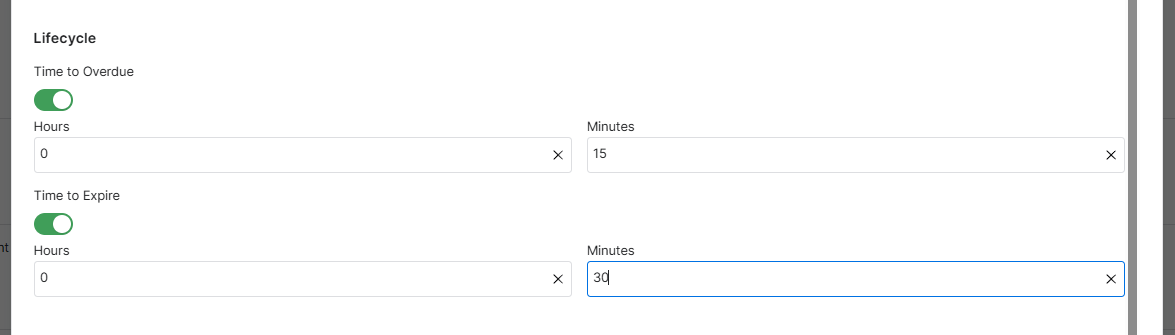
Configure when a Form becomes delayed
Define how much time an Operator has to complete the Form before it is considered delayed.
For example, a quality inspection triggered at the start of a production order might be expected to be completed within 15 minutes.
If the Form has not been completed within that time, its status changes to Delayed.
This makes it easier to identify inspections and procedures that have not been completed on time.
Configure when a Form expires
You can also define when a triggered Form should expire.
For example, a machine startup inspection might only be relevant during the first 30 minutes of production.
If the Operator has not completed the Form within that period, it becomes Expired.
Expired Forms can no longer be completed but remain available for follow-up through Forms reporting.
Example: Quality Inspection Lifecycle
A quality inspection is triggered when a production order starts.
| Time after Trigger | Form status |
|---|---|
| 0–15 minutes | Ongoing |
| After 15 minutes | Delayed |
| After 30 minutes | Expired |
Tip: Configure Lifecycle settings based on how time-sensitive the procedure is. A startup safety check may require a short completion window, while a general production inspection may allow more flexibility.
Lifecycle settings help Production Managers follow up on missed or delayed procedures and improve compliance with established production routines.
Step 6: Save and manage your Triggers
Once you have configured the Trigger:
- Review the Trigger type, timing, and conditions.
- Save your settings.
- Verify that the Trigger appears in the Form's Triggers section.
You can configure multiple Triggers for the same Form.
For example, a Quality Inspection Form could be triggered when an order starts, after a defined production quantity, and when the order finishes.
You can also return to the Settings tab to modify or remove existing Triggers.
Important: Trigger settings are applied immediately and are not part of the Form's version history. Changing a Trigger does not require publishing a new version of the Form.
However, the Form itself must be published before Operators can use it.
How triggered Forms appear in Operator Tools
When a configured production event occurs, Good Solutions automatically creates a Form action for the Operator.
The triggered Form appears in the Forms action list in Operator Tools, where the Operator can open and complete it.
Depending on the Trigger configuration and the Form's lifecycle, triggered Forms may also have time-related statuses such as overdue or expired.
Completed Forms are stored in Good Solutions and can be reviewed through the Forms Report.
Tips for configuring Form Triggers
- Match Triggers to real production processes: Choose events that naturally require an inspection or procedure.
- Avoid excessive triggering: Too many Forms can create unnecessary work for Operators.
- Use recurring Triggers thoughtfully: Set frequencies that match your quality or operational requirements.
- Configure relevant conditions: Target specific Measure Points, production events, or stop reasons where appropriate.
- Review timing: Ensure Operators receive Forms when they can act on them.
- Test your configuration: Verify that Forms appear as expected in Operator Tools.